################################################################################
#SPRITES
Sprites != Flipbook or Atlas.
Think how runs the movies: frame by frame. The sprites (Sprite sheet or Atlas) is an image where are all these frames, are like a “group” of frames and the RT engine reads each one, usually, in order. The resolution of these images is from 512px to 2048 (recommended). Depending on the number of frames, you have to set, in RT software, XY images number. I mean, in the next example, we have 4×4 images (16 frames). We can have 1×1,2,2,3,3,4,4,… 10×10. Be careful, you have to put more images in the minim size.
Can you put 1000 frames in an image with a 2048x2048px resolution?. Not easy. You have to optimize and use Motion Vector sheet images to create a very well blending between images…
Slow-motion:
Normal motion:
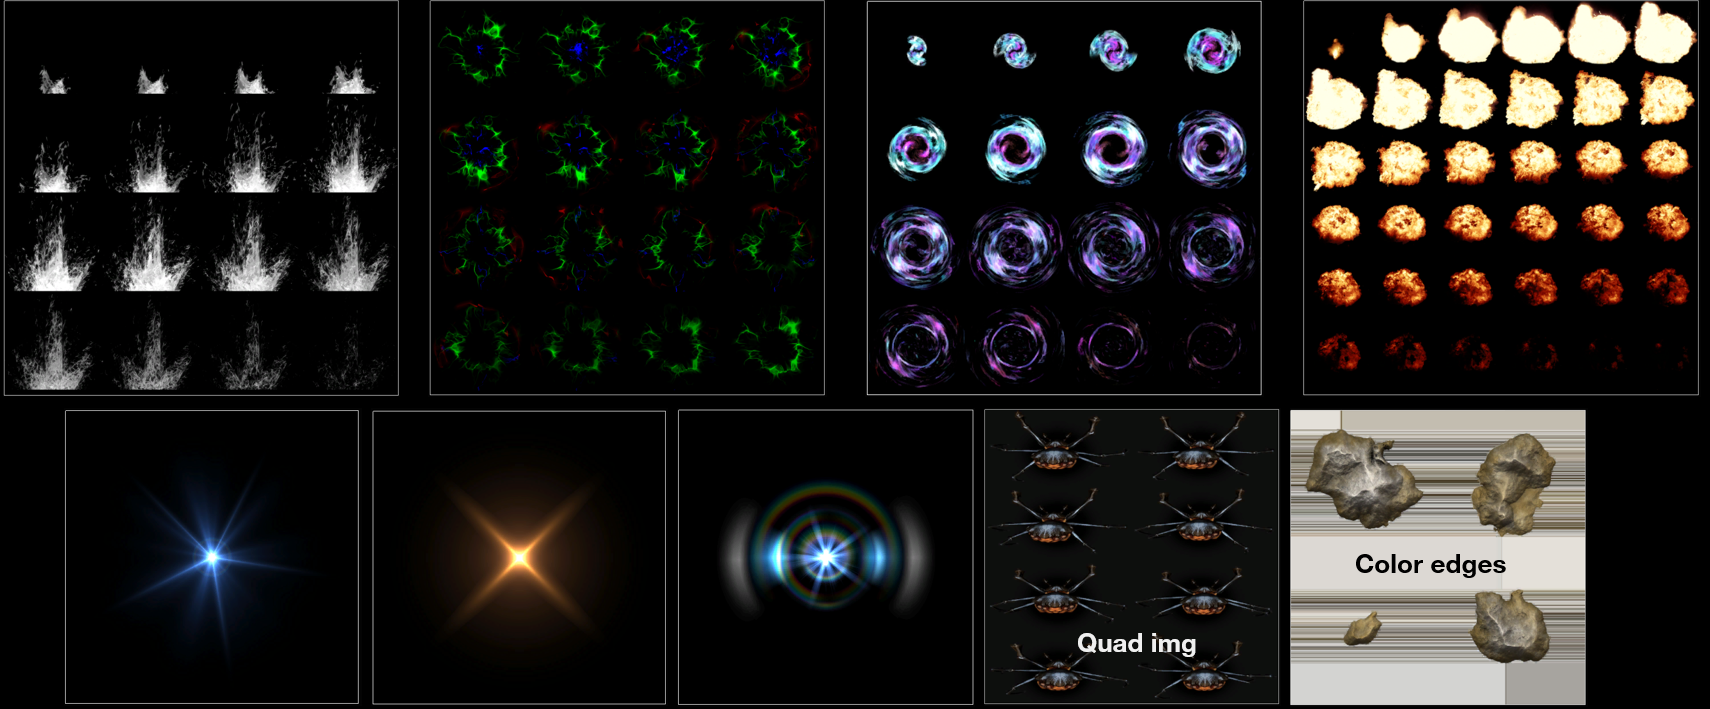
Examples of sprites:
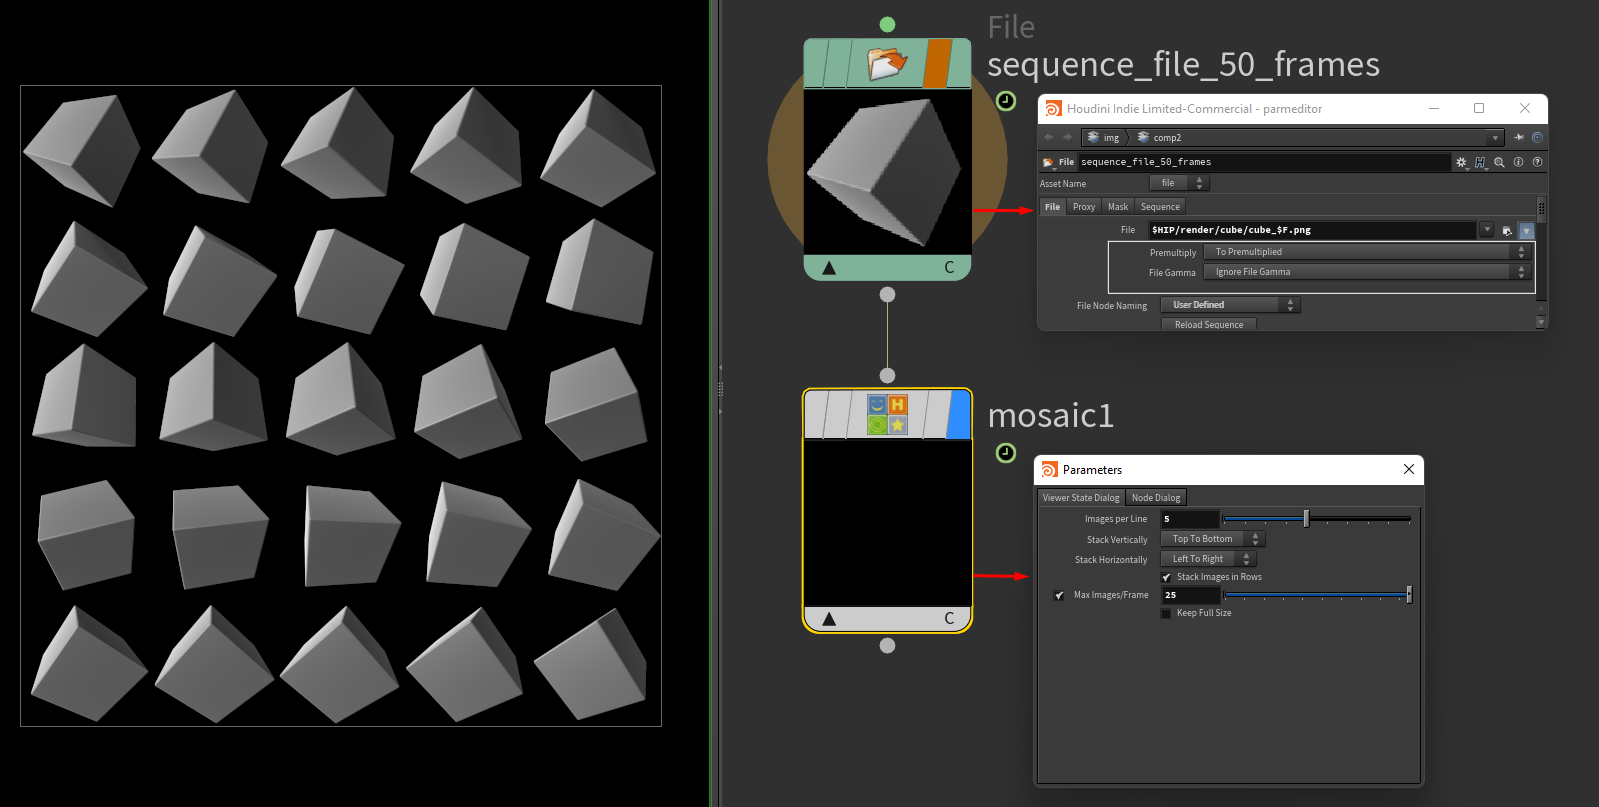
In Houdini, we can get these “compositions” with this setup in COPs context:
Node file + Node Mosaic + (others node for creating alpha, export, etc…)
In this example, this sequence has 50 frames, in the Mosaic‘s node you have to set: “Image per Line = 5” and “Max Images/Frame = 25” (in this case).
If your sequence has 100 frames, for example, you have to set it: “Image per Line = 10” and “Max Images/Frame = 100”
################################################################################
#Particles + Sprites
What happens if particles + sprites work together?
################################################################################
#SHADERS and projections
This technic is a lot of used in video games. Its logic is very simple: Animate the UVs of the object. It can be animated in X, Y, or Z (or all together).
For the projections, all RT engines are the same process. Is like we paint the surface.
This texture is “projected” on the surface:
################################################################################
#Vertex animation texture (VAT)
To get the VAT we need twice elements: A texture and a geometry.
– Texture: The texture in this technic, contents enough information to animate or paint a geometry. Only with a texture. These textures are like this:
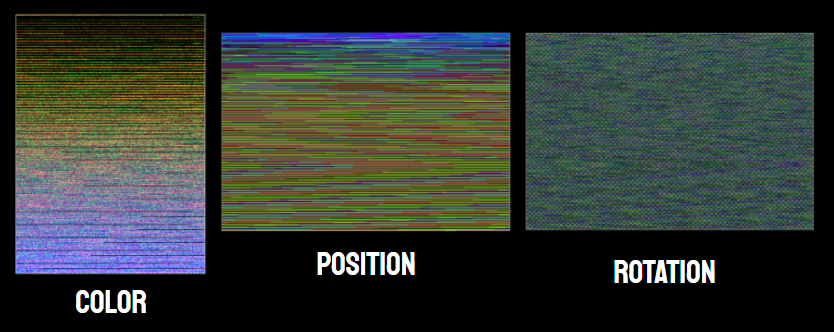
How you can see each texture is focused in an attribute: COLOR – POSITION – ROTATION
These textures are assigned, through a process between Houdini + Real-Time engine, to geometry that, this geometry, has always the same shapes for each mode:
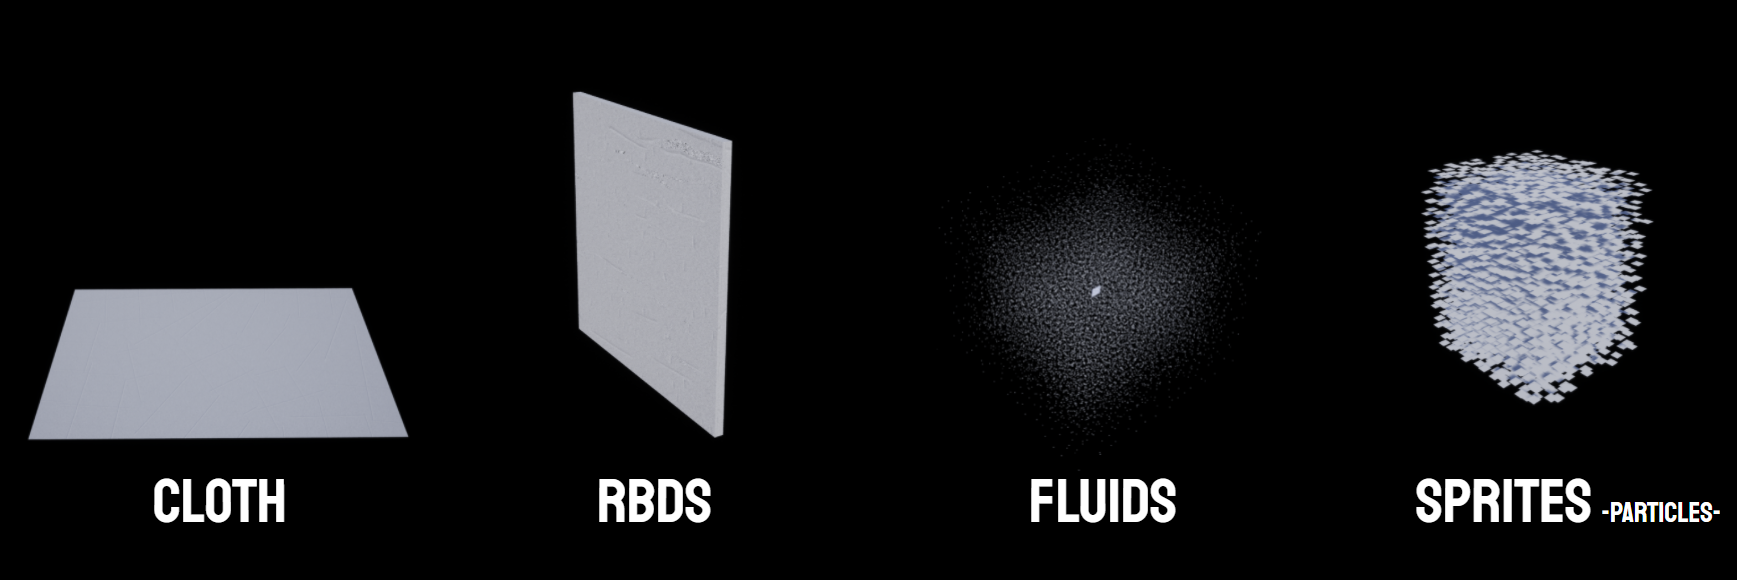
Geo for Cloth: This is a simple quad.
Geo for RBDs: Has the form of the object simulated. For example, here we can see a wall.
Geo for Fluids: This is a box with points.
Geo for Sprites: This is a box with triangles.
If we assign the texture (in UE5) to these shapes, we get this awesome animation in Real-Time.
We can get it with the Vertex_animation_texture node in OUT context in Houdini:
################################################################################
#Skinning decomposition
This technique is not easy, internally. Basically, we get the rig and animation from the animation (simulation).
Fast explanation:
The normal process would be like this: Modeling – Rig – Skinning – Animation. Export to UE5 (for example)
The Skinning Decomposition is like this: Modeling – Simulation or Animation (anything that you want to simulate or animate) – Rig – Skinning. Export to UE5 (for example).
We can get this with dembones_skinningconverter and skinning_converter nodes in SOP context in Houdini:

Simulation in SideFX Houdini (This is a simple cloth, but you can animate/simulate anything: Soft bodies, normal geometry, etc…)
(Spanish Tutorial 1, tutorial 2)
The green dots are the bones “skinneds” from the simulation.
Inside UE5
This technique is very powerful!
—
You can see all the Labs Nodes here: https://www.sidefx.com/tutorials/game-development-toolset-overview/
More info of SideFX Houdini for games: https://www.sidefx.com/industries/games/
################################################################################
#updating page
#Python, VEX, nodes, and more… soon…
################################################################################